
|
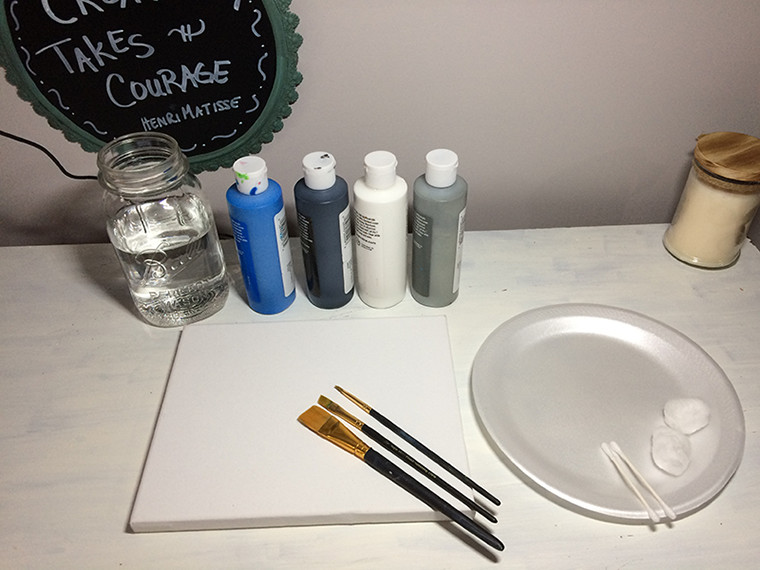
Here is a fun step-by-step painting to do while you're snowed in with your kiddos at home. First, grab your supplies. Here is what you'll need.
 Step 1: Paint the entire canvas with the white paint. Yes, you're reading that correctly—paint the white canvas white. Oh gussie, you'll get a funny look for that but trust me it's needed. 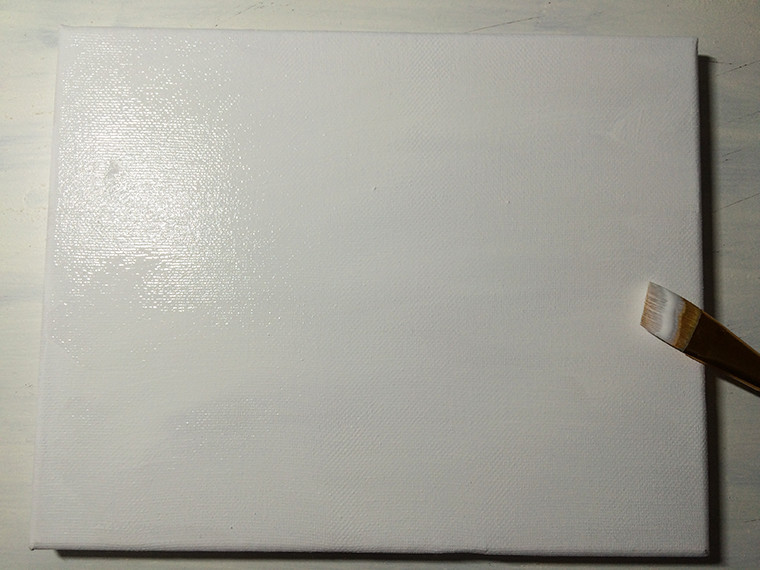 Step 2: With the same paint brush grab a little gray paint. The canvas should still be wet from the white paint. Start adding the gray paint to the canvas going in broad horizontal strokes. Keep the gray light and don't go to dark. You should fill about 2/3 of the canvas with the gray. Are you still with me? 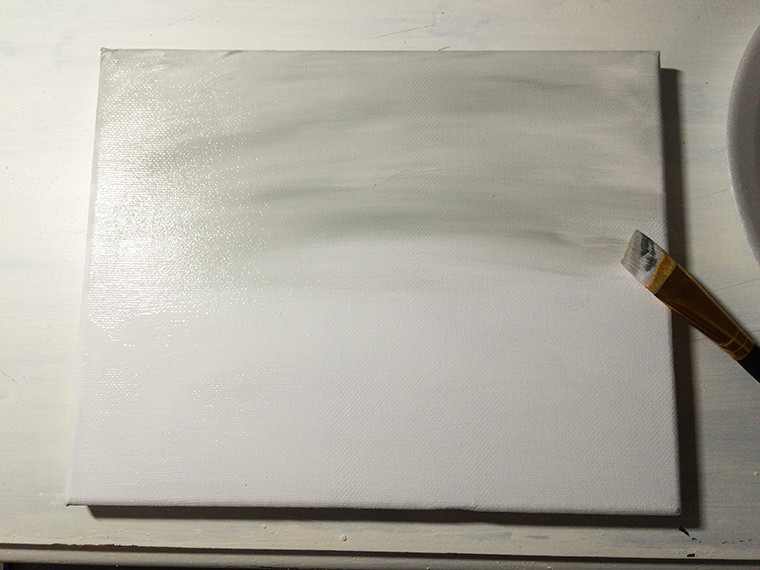 Step 3: With the same brush pick up a little of the blue and begin adding it to the same area of the gray—mixing the blue in with the gray. Add a couple small outlines for hills. 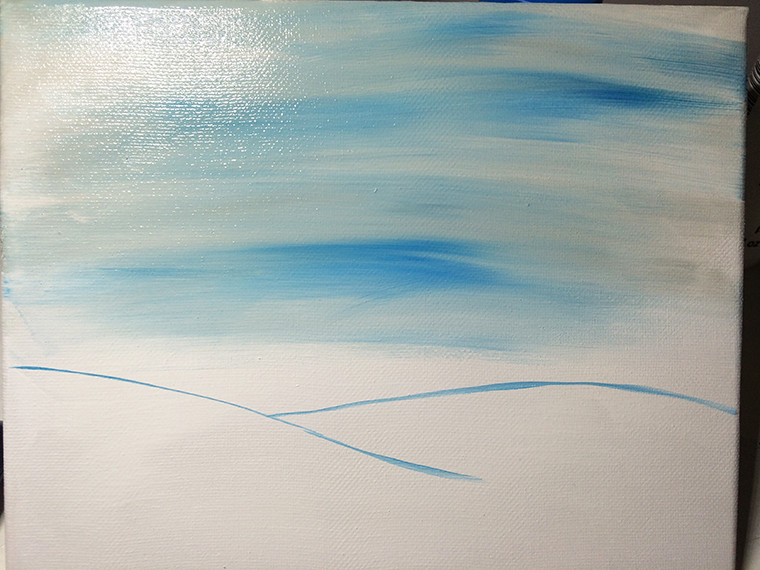 Step 4: With that same brush you've been using grab the white and blend the sky. Then start adding white to the hills—it should have a hint of the blue. 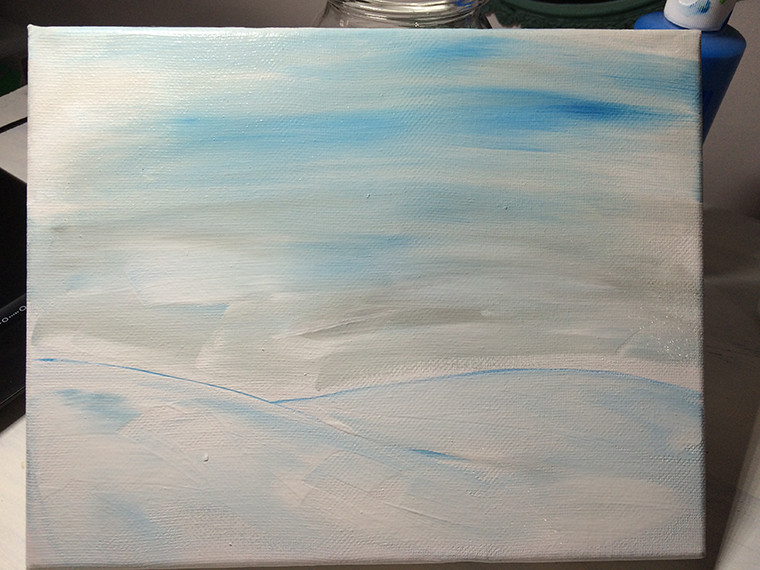 Step 5: It's time to start adding in the trees. Take a smaller brush (angled brushes work best) pick up the gray and begin painting in trees. Make smaller trees in the background and larger ones in the front. Try to keep the trees thin when you begin because you can always make them thicker if you prefer. If using an angled brush turn the brush vertical to get thin lines. 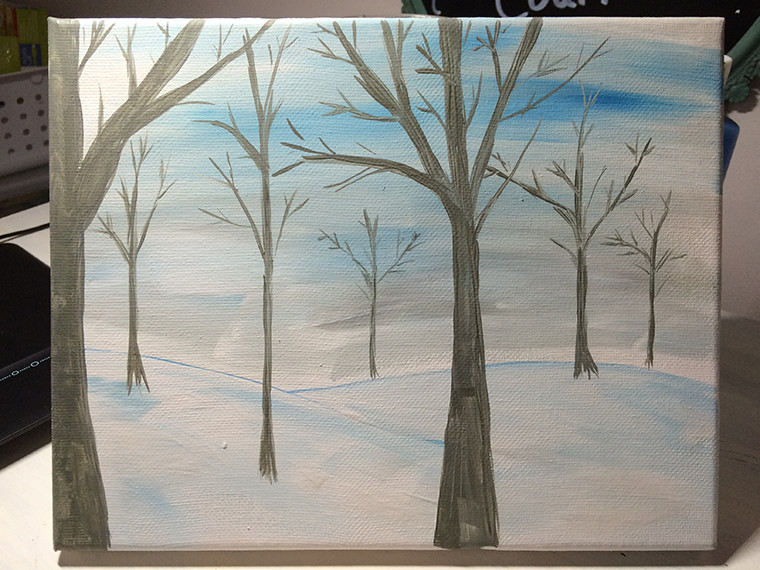 Step 6: Add a little detail to the trees. Grab a small brush and dab in the black paint. Paint small black marks on the tree. See detailed image below. 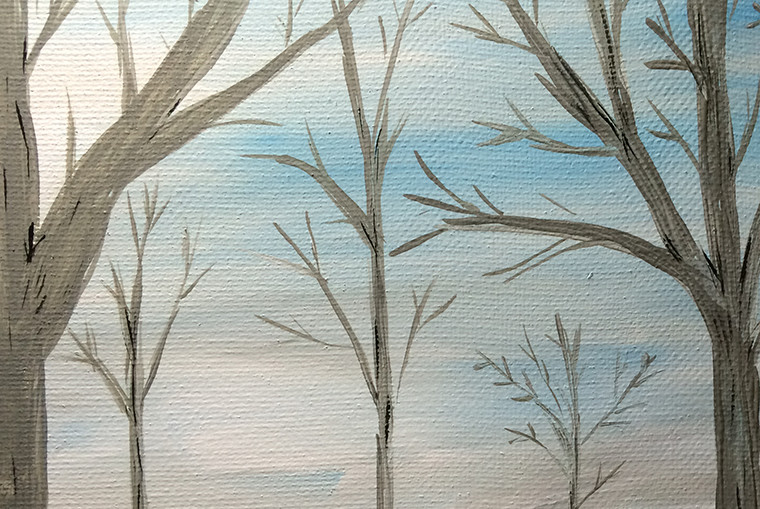 Step 7: Here's a fun part the kids will enjoy. Grab the cotton ball and dip in the white paint. Don't get too much paint. Start dabbing the cotton ball along the hills covering the bottoms of the tree trunk. This gives great texture for the snowy hills. (uh hum...notice the great looking nail color I'm wearing.) 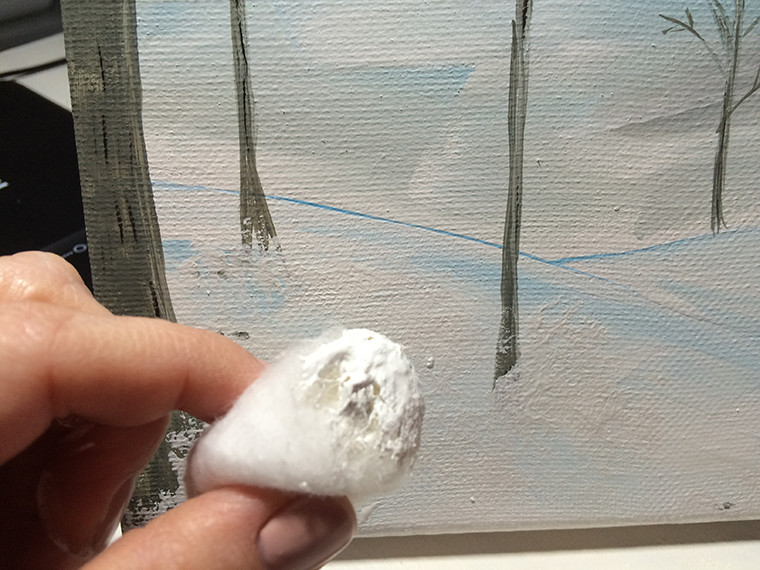 Step 8: Time to add the falling snow. Grab a cotton swab and dab the tip of it in the white paint. Don't get too much on the tip. Now, let the dabbing begin. Be sure to dab some snow on the trees too and make varying sizes of snow. (Oh, please notice that nail color again—my fave.)  Step 9: Add more snow to the tree branches for detail. (We're almost finished) 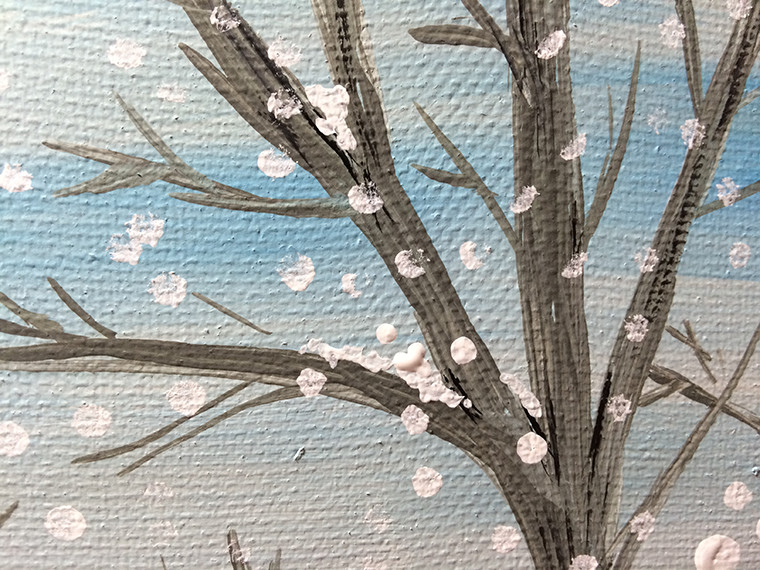 Step 10: You're done! Stand back and take a look. 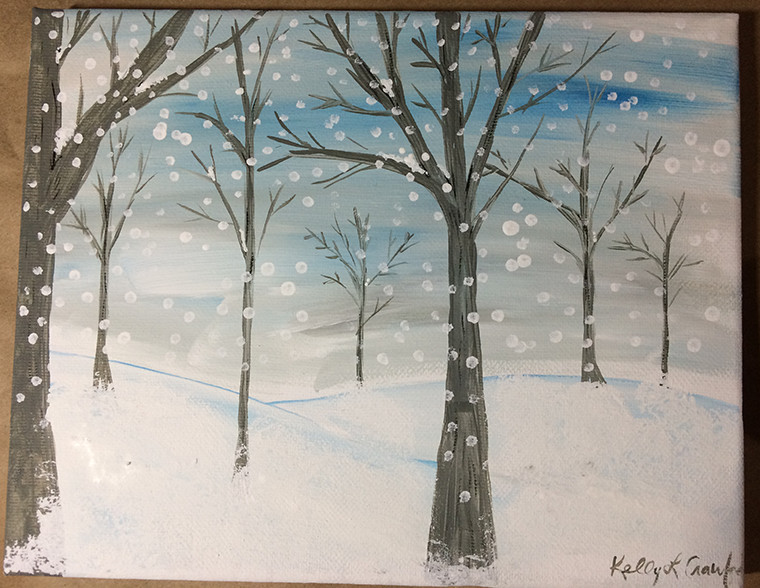 I hope you've enjoyed this step-by-step painting. Please remember to have fun with painting. I hope you'll join me in one of my classes or reach out to book a party with me.
1 Comment
|

Kelly L. CrawfordArtist, graphic designer, marketer, farmer's wife, mother of 3 Archives
September 2017
Categories |
 RSS Feed